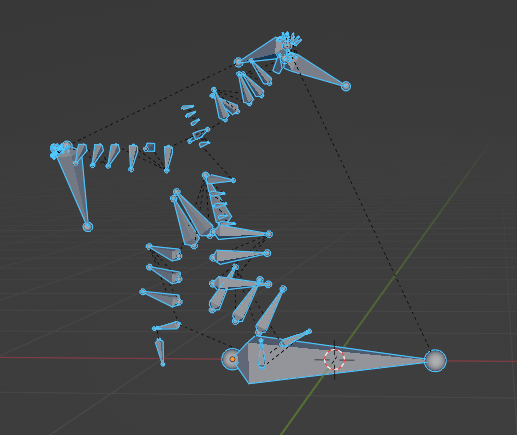
I treated myself to an early x-mas gift of buying a bunch of stock animations from the fab.com store. I bought four packs, Sword and Shield (also comes with 2H animations), Spear and Shield, Mage, and Bow & Arrow. As a bonus, these animation packs came with a pre-wired animgraph for each character.
However, they are all linked with UE4 skeletons. I wanted to rewrite them to use their UE5 animations / blend spaces and also actually understand the graph by recreating it. After a bit of toil (and updating how my characters states change) I’ve been able to get most of the actions in and responsive to my input. As you can see below, my character can attack (3 different attack combo), block, and now walks backwards instead of flipping the camera around.
Let’s discuss some of the changes to the movement I had to do, then we’ll talk about the crux of this post, something you can notice within the first 3 seconds of the video.
Movement changes
When I first added in input handling, I handled a user pressing the ‘backwards’ key by forcing the character to flip around 180 degrees. This was done by simply updating the FacingYaw value by 180.f, then applying that to the movement yaw (if the left or right key were held down, or mouse input, that would update the MovementYaw value).
// this is if the camera is shifted to a particular degree, we capture it as movement yaw
auto MovementYaw = JPH::DegreesToRadians(YawsToProcess.at(i));
// ... handle other key presses ...
if (Input.IsPressed(input::InputType::Backward))
{
	ControlInput.SetX(-1.0f);
	FacingYaw = -FacingYaw; // invert
	FacingYaw += JPH::DegreesToRadians(180.f);
}
// ... apply movementyaw + facing yaw:
auto CharFacingRot = JPH::Quat::sRotation(JPH::Vec3::sAxisY(), MovementYaw+FacingYaw);
// Update character physics with rotation/input data
Character.HandleMovementInput(It.delta_time(), ControlInput, CharFacingRot, Input.IsPressed(input::InputType::Jump));
I don’t really like this style of movement and feel like it breaks the immersion. Pressing move backwards, should just make you move backwards. And now I have the animation blend spaces where it actually looks good. But I need to do this on the server, which has no concept of animations. So let’s update the physics, to actually move backwards:
// check player input
auto bIsMovingBackwards = Input.IsPressed(input::InputType::Backward);
// update control and facing yaw, make sure to handle if pressing left/right concurrently.
if (bIsMovingBackwards)
{
	ControlInput.SetX(-1.0f);
	// These two update if the player is pressing left/right keys
	if (FacingYaw >= 90.f) { FacingYaw -= .45f;}
	if (FacingYaw <= -90.f) { FacingYaw += .45f;}

	FacingYaw = -FacingYaw; // invert
}
// same as before
auto CharFacingRot = JPH::Quat::sRotation(JPH::Vec3::sAxisY(), MovementYaw+FacingYaw);
Character.HandleMovementInput(It.delta_time(), ControlInput, CharFacingRot, bIsMovingBackwards, bIsJumping);
However, moving backwards means we should be moving much slower, for that affect, I simply ‘dampen’ movement depending on the characters current state:
switch (ActType)
{
	// disable movement for all cases
	case character::ActionType::KNOCKED_DOWN:
	case character::ActionType::TWOHAND_ATTACK:
	case character::ActionType::SWORDSH_ATTACK:
	case character::ActionType::SPEARSH_ATTACK:
	case character::ActionType::PARRYING:
	case character::ActionType::DEAD:
	case character::ActionType::STUNNED:
	{
		Character->PhysicsCharacter->SetLinearVelocity(JPH::Vec3::sZero());
		return;
	}
	// dampen movements for these
	case character::ActionType::BLOCKING:
	case character::ActionType::BOW_ATTACK:
	{
		bShouldDampen = true;
		break;
	}
	// otherwise do nothing
	default:
	break;
}

Character->HandleMovementInput(DeltaTime, InMovementDirection, InRotation, bIsMovingBackwards, bIsJumping, bShouldDampen);
I also make it so we stop all movement if the character is any of those above states (KNOCKED_DOWN/DEAD etc). Inside of ControllableCharacter::HandleMovementInput I just divide the velocity by half to dampen it:
// dampen movement if we are blocking, parrying or doing some other action that should slow our velocity
if (bShouldDampenMovement)
{
	NewVelocity *= 0.5f;
}
PhysicsCharacter->SetLinearVelocity(NewVelocity);
This works all well and good except for one major problem.
Root Motion in Animations
There’s two types of movement in animation sequences. Treadmill and Root Motion. Treadmill is what you would guess it is, just moving in place. In these animation types you use physics to drive the character in the direction of the animation. The other type of animation is Root Motion. In this case the animation itself drives the character forward, without involvement of the physics engine. It’s pretty obvious which type is in use as your character will “snap back” to the original location if your animation has it. (That is of course if it’s not enabled on the animation in UE5). As you can see in the video I posted above, this is exactly what happens. The character lurches forward for the attack, then once the animation is over, snaps back to the original location.
So the animations I bought have root motion baked in. While I could just disable root motion in UE5 and drive the character myself, this is a learning experience. So I might as well figure out how to apply root motion in my server game engine and make sure the client applies the same deterministic movement so there’s no conflict about where characters are supposed to be located.
The first step to getting this to work is extracting the root motion data. We can export the sequence animations from UE5 as an FBX. Next up, we need to parse the FBX and pull out the animation curve data. I installed Autodesk FBX SDK and their python wrapper. See my extractor snippet code for more details and links.
After filtering just the root node, we have the following data:
Axis,KeyFrame,Value,InterpolationType
X,0,0.0,eInterpolationCubic
X,0*,0.0,eInterpolationCubic
X,1,0.0,eInterpolationCubic
...
Y,0,-0.0,eInterpolationCubic
Y,0*,-0.16823062300682068,eInterpolationCubic
Y,1,-0.6597434282302856,eInterpolationCubic
Y,1*,-1.4547698497772217,eInterpolationCubic
...
Z,0,0.0,eInterpolationCubic
Z,0*,0.0,eInterpolationCubic
Z,1,0.0,eInterpolationCubic
Root motion locomotion data usually only uses the Y axis, so we’ll filter to only that part of the transform data. The more astute reader may notice that we have keyframes with and without the * symbol. I could not for the life of me could not figure out what this extra data was. So I asked a friend who works with animation data a lot and it turns out UE5 exports animations by default at 30fps.
However, the animations I’m working with are 60fps. You can tell in UE5 by opening it up and looking at the details in preview:

So our animations are at 60fps, our exported versions are at 30fps, and the game server runs at 30fps. It’s best to only use time instead of frames when determining where a character should be so we’ll need to build some objects that let us evaluate what the value should be at a specific time.
A Very Small Curve Library
Slightly adapted from UE5’s RichCurves, I made a slimmed down version to handle my particular use case. As with most systems, I always start out writing a unit test to get my ideas in about how I want a system to work. First we need to read the CSV data:
const std::filesystem::path Anim(TEST_ASSET_DIR "animations/combat/UE5_SSH_Attack_01_Seq.csv");
auto Reader = csv::CSVReader(Anim.string());
std::vector<double> KeyValues;

int FrameCount = 0;
for (const auto& Row : Reader)
{
	if (Row["Axis"].get<std::string>() == "Y")
	{
		double KeyValue = Row["Value"].get<double>();
		KeyValues.emplace_back(KeyValue);
		FrameCount++;
	}
}
float AnimRunTime = static_cast<float>(FrameCount) / 60.f;
float TimePerFrame = AnimRunTime / static_cast<float>(FrameCount);
We need to keep track of a few things:
- Number of frames
- Values of each frame
- How long the animation will take
- Time per frame (these animations are 60fps so we divide the full runtime by the number of frames)
With that, I created a CurveKey data type that houses the time and value, and a Curve container:
curves::Curve AnimCurve;
uint32_t Idx = 0;
for (const auto &FrameVal : KeyValues)
{
	auto FrameTime = TimePerFrame*static_cast<float>(Idx++);
	AnimCurve.InsertOrderedKey(curves::CurveKey(FrameTime, FrameVal));
}
Probably the most interesting bit of code is taken from UE5 in which we do a quick binary search given the input time we are looking for:
uint32_t First = 1;
const uint32_t Last = NumKeys - 1;
uint32_t Count = Last - First;

while(Count > 0)
{
	const uint32_t Step = Count / 2;
	const uint32_t Middle = First + Step;
	if (InTime >= Keys[Middle].Time)
	{
		First = Middle + 1;
		Count -= Step + 1;
	}
	else
	{
		Count = Step;
	}
}
Result = glm_lerp(Keys[First - 1].Value, Keys[First].Value, InTime);
Basically it starts in the middle and depending on whether the input time is greater than or less than the key time at the middle, we either iterate up or down. Once we find the key (First) we then lerp between the value before it and the value we found given the InTime. Here I just call out to glm_lerp to do the linear interpolation for me.
So that’s pretty much it, now as we progress in game time we pass in the DeltaTime to figure out what the location (Y axis) should be:
float CurrentRunTime = 0.f;
float DeltaTime = 0.f;
GameWorld.set_target_fps(30);

while(GameWorld.progress())
{
	DeltaTime = GameWorld.delta_time();
	CurrentRunTime += DeltaTime;
	if (CurrentRunTime > AnimRunTime)
	{
		break;
	}
	float CurveVal = fabs(AnimCurve.Eval(CurrentRunTime));
	Logger.Info("CurveVal {} at: {}", CurveVal, CurrentRunTime);
}
Next step is change my state system to know which animation data to process depending on the attack, and then pass in the delta time to add to the characters location (or calculate the velocity and pass that into Character->SetLinearVelocity).
I may of course throw all of this out, disable root animation motion, and just use a blend space to keep the legs moving and only keep the upper body animations, but I want to see what this looks like and feels like first! Also I probably want to be able to do this for other animations such as leaps and rolls which were also included in the packs I bought.
